
2: Collections
Meteor already sets up MongoDB for you. In order to use our database, we need to create a collection, which is where we will store our documents, in our case our tasks.
You can read more about collections here.
In this step, we will implement all the necessary code to have a basic collection for our tasks up and running using React hooks.
2.1: Create Tasks Collection
We can create a new collection to store our tasks by creating a new file at imports/api/TasksCollection.js which instantiates a new Mongo collection and exports it.
import { Mongo } from "meteor/mongo";

export const TasksCollection = new Mongo.Collection("tasks");
Notice that we stored the file in the imports/api directory, which is a place to store API-related code, like publications and methods. You can name this folder as you want, this is just a choice.
You can delete the links.js file in this folder as we are not going to use this collection.
You can read more about app structure and imports/exports here.
2.2: Initialize Tasks Collection
For our collection to work, you need to import it in the server so it sets some plumbing up.
You can either use import "/imports/api/TasksCollection" or import { TasksCollection } from "/imports/api/TasksCollection" if you are going to use on the same file, but make sure it is imported.
Now it is easy to check if there is data or not in our collection, otherwise, we can insert some sample data easily as well.
You don't need to keep the old content of server/main.js.
import { Meteor } from "meteor/meteor";
import { TasksCollection } from "/imports/api/TasksCollection";

const insertTask = (taskText) =>
  TasksCollection.insertAsync({ text: taskText });

Meteor.startup(async () => {
  if ((await TasksCollection.find().countAsync()) === 0) {
    [
      "First Task",
      "Second Task",
      "Third Task",
      "Fourth Task",
      "Fifth Task",
      "Sixth Task",
      "Seventh Task",
    ].forEach(insertTask);
  }
});
So you are importing the TasksCollection and adding a few tasks to it iterating over an array of strings and for each string calling a function to insert this string as our text field in our task document.
2.3: Render Tasks Collection
Now comes the fun part, you will render the tasks using a React Function Component and a Hook called useTracker from a package called react-meteor-data.
Meteor works with Meteor packages and NPM packages, usually, Meteor packages are using Meteor internals or other Meteor packages.
This package is already included in the React skeleton (meteor create yourproject) so you don't need to add it but you can always add Meteor packages running meteor add package-name:
meteor add react-meteor-dataNow you are ready to import code from this package, when importing code from a Meteor package the only difference from NPM modules is that you need to prepend meteor/ in the from part of your import.
The useTracker function exported by react-meteor-data is a React Hook that allows you to have reactivity in your React components. Every time the data changes through reactivity your component will re-render. Cool, right?
For more information about React Hooks read here.
import React from "react";
import { useTracker } from "meteor/react-meteor-data";
import { TasksCollection } from "/imports/api/TasksCollection";
import { Task } from "./Task";

export const App = () => {
  const tasks = useTracker(() => TasksCollection.find({}).fetch());

  return (
    <div>
      <h1>Welcome to Meteor!</h1>

      <ul>
        {tasks.map((task) => (
          <Task key={task._id} task={task} />
        ))}
      </ul>
    </div>
  );
};
But wait! Something is missing. If you run your app now, you'll see that you don't render any tasks.
That's because we need to publish our data to the client.
First, create a publication for our tasks:
imports/api/TasksPublications.js
import { Meteor } from "meteor/meteor";
import { TasksCollection } from "./TasksCollection";

Meteor.publish("tasks", () => {
  return TasksCollection.find();
});
Now, we need to import this file in our server:
...
import { TasksCollection } from '/imports/api/TasksCollection';

import "../imports/api/TasksPublications";

const insertTask = taskText => TasksCollection.insertAsync({ text: taskText });
...
The only thing left is subscribe to this publication:
imports/ui/App.jsx
import React from 'react';
import { useTracker, useSubscribe } from 'meteor/react-meteor-data';
import { TasksCollection } from '/imports/api/TasksCollection';
import { Task } from './Task';

export const App = () => {

  const isLoading = useSubscribe("tasks");
  const tasks = useTracker(() => TasksCollection.find({}).fetch());

  if (isLoading()) {
    return <div>Loading...</div>;
  }
  ...
}
As you can see, when subscribing to a publication using useSubscribe you'll get a isLoading function, that you can use to render some loading component before the data is ready.
For more information on Publications/Subscriptions, please check our docs.
See how your app should look like now:

You can change your data on MongoDB in the server and your app will react and re-render for you.
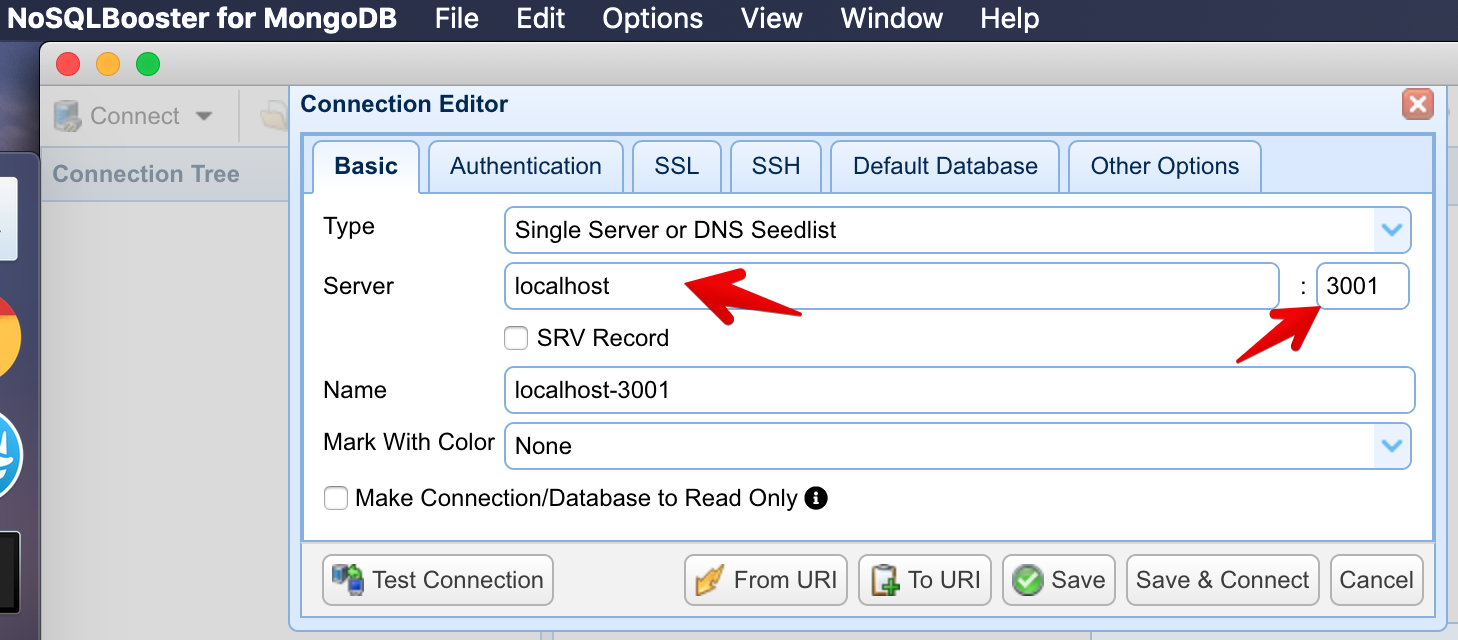
You can connect to your MongoDB running meteor mongo in the terminal from your app folder or using a Mongo UI client, like NoSQLBooster. Your embedded MongoDB is running in port 3001.
See how to connect:
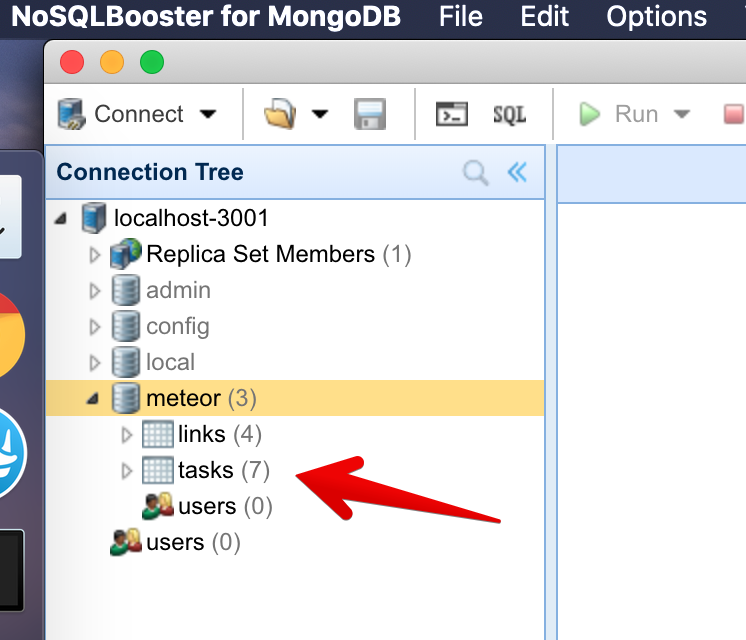
See your database:
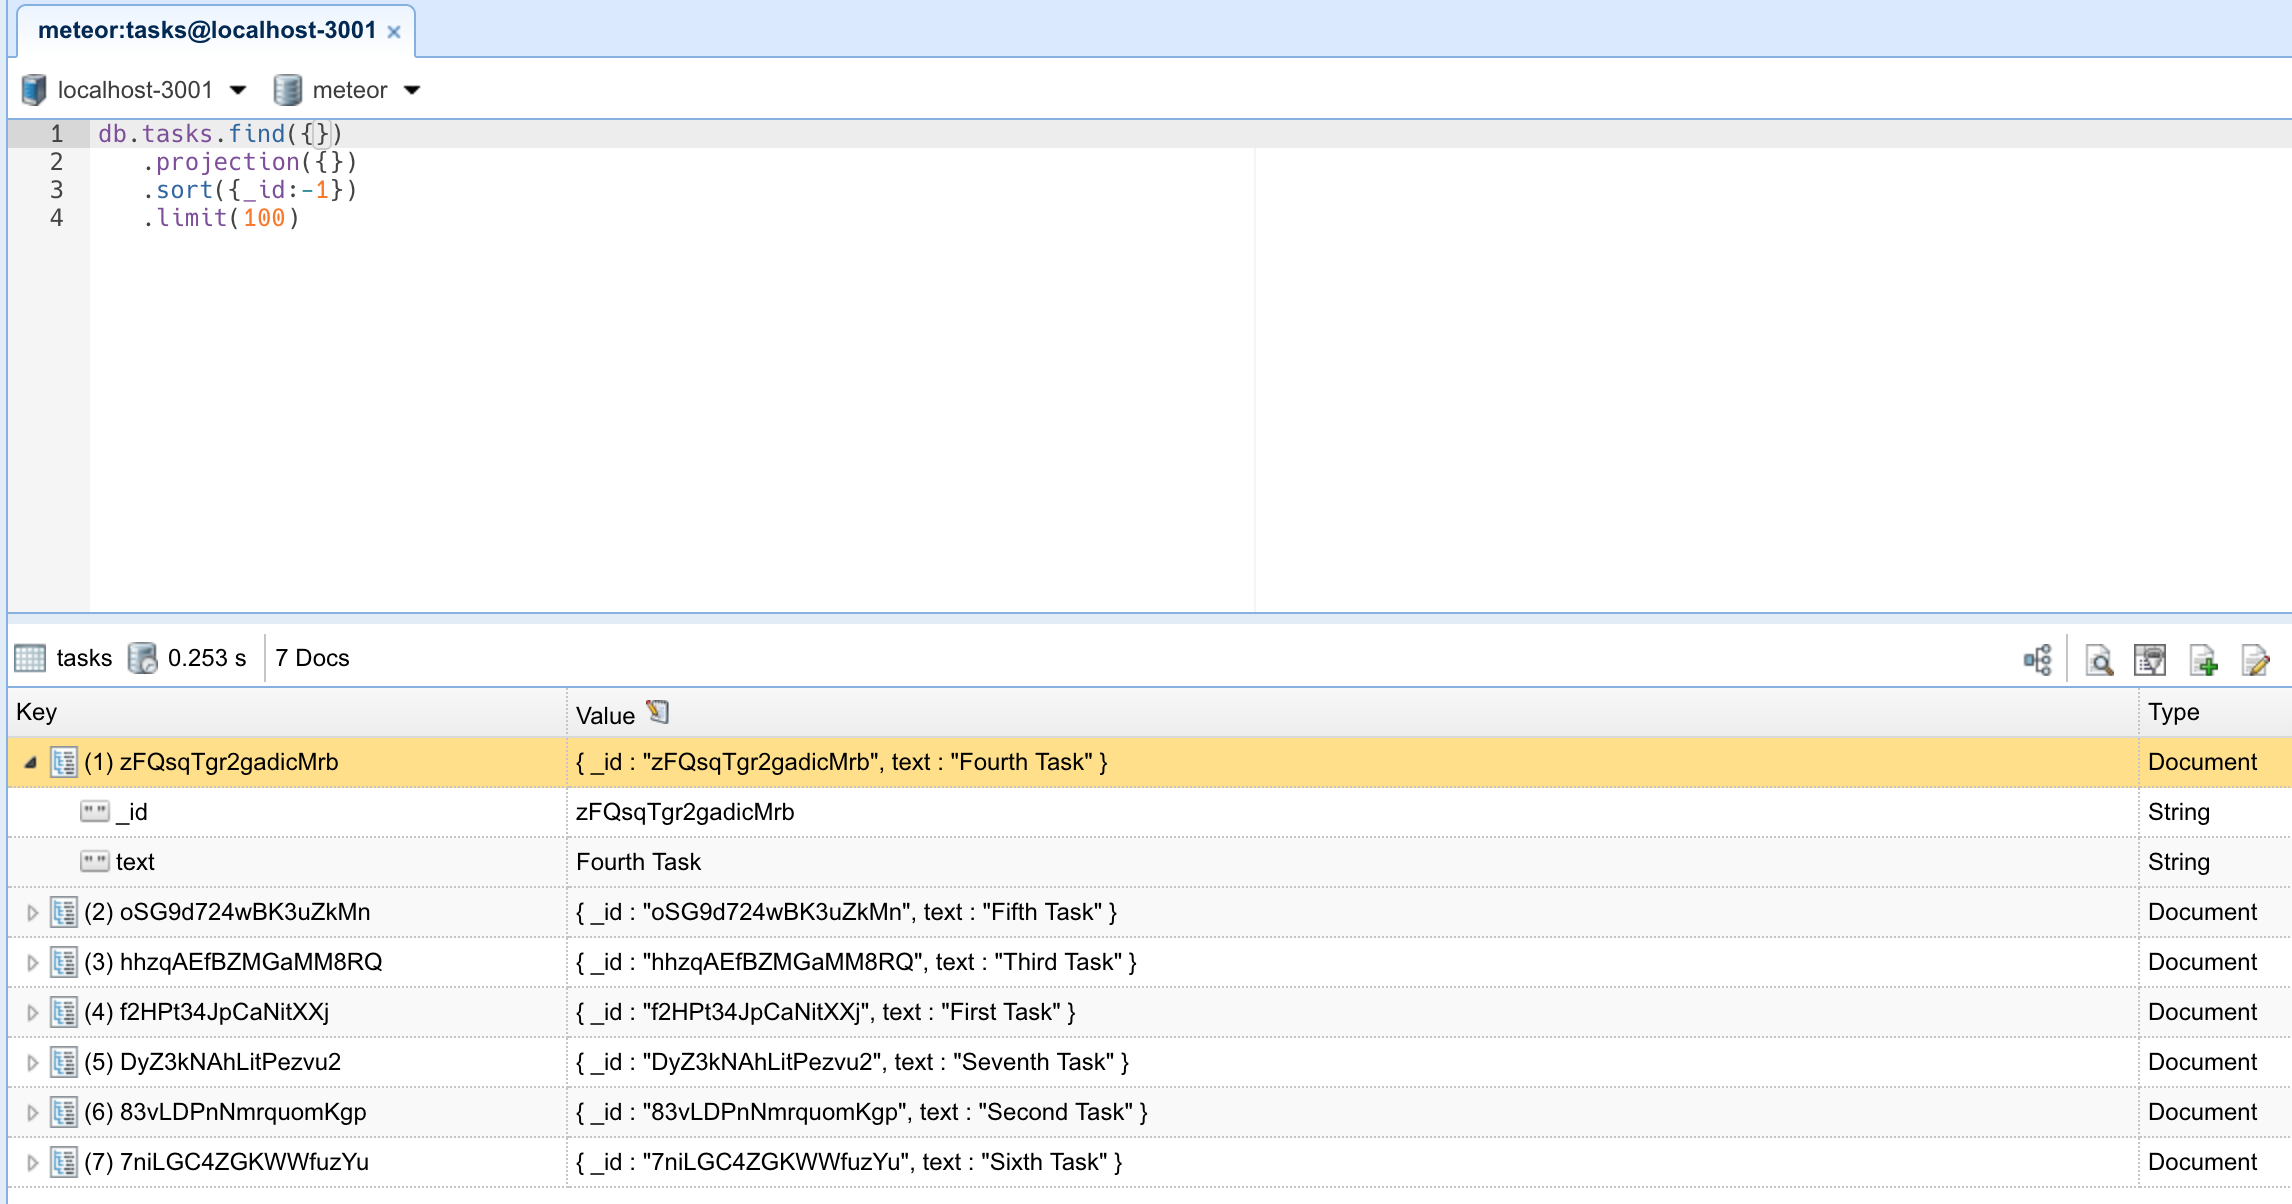
You can double-click your collection to see the documents stored on it:
In the next step, we are going to create tasks using a form.